Validatornode is a trusted validator partner of the Akash Network. We facilitate seamless profitable staking for our active staking partners/delegators.
In this article, we explain in detail how to start staking your Akash $AKT and benefit from ~57% APY passive-income potential.
Article Series (3 of 7)
This is the 3rd article in our series relating to the purchasing, trading, and staking of Akash ($AKT). If you are just discovering this article series, for the first time, you may want to review our previous articles;
- How To Purchase Cryptocurrency (Via BankdraftS) using Coinbase.
- How To Purchase Akash Tokens ($AKT) Using Gate.io.
- How To Stake Akash ($AKT) via Keplr
If you have already purchased your Akash ($AKT) and want to know how to create a personal wallet and begin staking then read on.
Akash Wallet Options
At the time of this writing, there are currently 3 options for holding and maintaining your Akash within a personal “private” wallet.
While there are wallets available on the exchanges that Akash is listed on, we do not recommend that you use those wallets for storing large amounts of Akash. Exchange wallets should only be used to store Akash as you buy/sell/trade with other currencies and should contain the minimum amount of Akash that you are comfortable with holding there.
Personal “private” wallets are the safest way to hold and store your Akash $AKT. We highly recommend that you create a personal Akash wallet.
The 3 Personal Wallet options available today are;
- Keplr Wallet – this is a personal wallet that is provided as an extension to the Chrome browser
- Cosmostation Wallet – this wallet is available for mobile (Android/IOS) and web
- Akash CLI – the Akash CLI is a command line interface wallet that has versions for all desktop OS'
For the remainder of this article we will focus our discussion on the Keplr (Chrome Extension) Wallet. In the coming days, we will provide additional articles on the other two personal “private” wallet types.
Let's get started…
How to Stake/Delegate $AKT using Keplr Browser Extension
Keplr is an open-source Chrome browser extension wallet for the Cosmos ecosystem. It supports all tokens developed using the Cosmos SDK and Akash is one of them.
Pre-Installation Steps
To get started with Keplr you must first meet a few pre-installation steps;
- If you already have the chrome browser installed on your desktop then continue to the next section
- If you do not have the chrome browser installed, download/install Chrome from here – https://www.google.com/chrome/
- Once you have chrome installed, continue on to the Installation of the Keplr Chrome Extension
Keplr Wallet Extension Installation
Since Keplr is a Google Chrome Browser extension. It is very easy to install, setup, and get running. Follow the steps below for the installation.
- Open Google Chrome and click the below link to install Keplr wallet extension in your browser
Link to Keplr Extension –>: Keplr Wallet Extension
(this will take you to the chrome extension home > extensions > keplr site – see below)
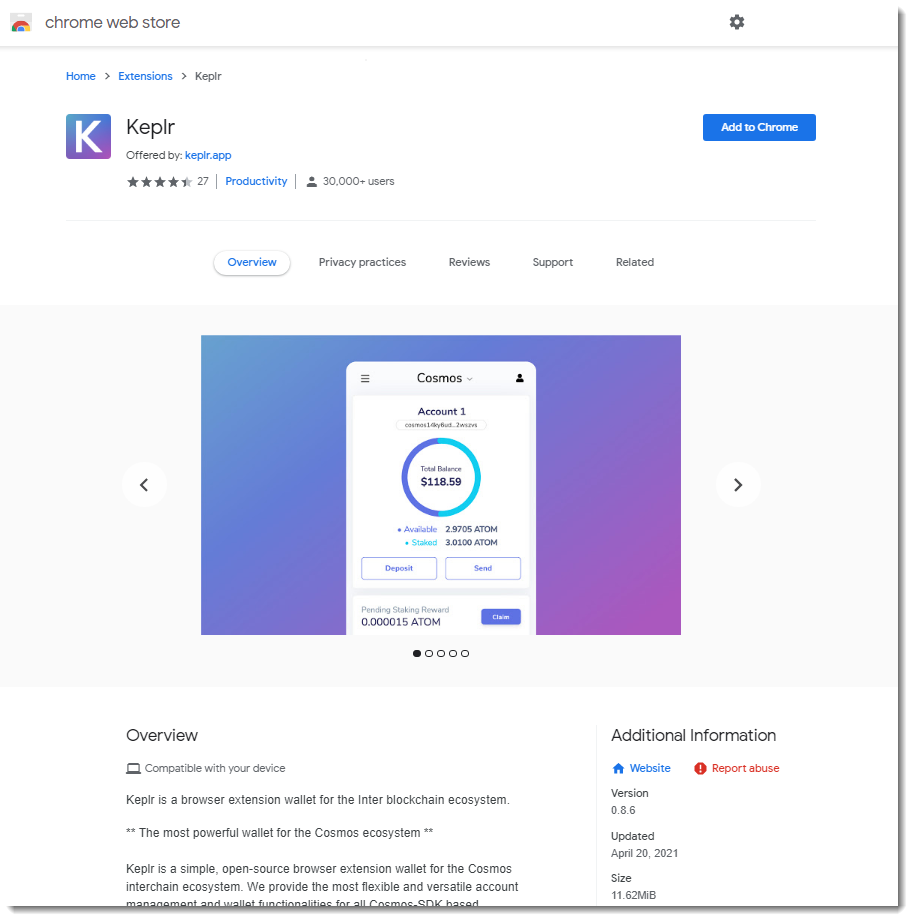
- Click on the blue “Add to Chrome” button to install the extension. You will need to answer a few questions to complete the install.
- Once the extension is installed, you can see it by clicking on the Chrome Extensions icon in the top right corner of your Chrome browser
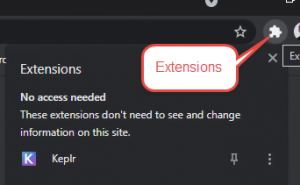
- At this point, we suggest that you click the pin next to Keplr in the extension listing so that it always stays visible in the browser's top right
- Now the Keplr “K” icon should show in the top of chrome next to the browser extension icon
- Click the Keplr “K” and a new Chrome tab should open prompting you to create an account to activate your Keplr wallet
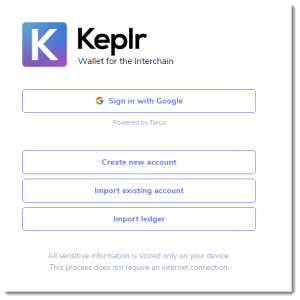
- Click the button “Create new Account“
- You will now be provided a mnemonic phrase of 12 words (we recommend switching to 24 word for better security)
- Write down the 12/24 word phrase and store it in a safe place. The phrase can be used to restore your wallet if you forget your account/password
- Click “Next“
- You will be prompted to confirm your Mnemonic seed by selecting the words in the order you wrote them down. Select the words in the proper order.
- Click “Register” and your account should be created
- Congratulations! You now have a Keplr Wallet Account.
Using Your Keplr Wallet to Deposit and Stake Akash $AKT
Now that you have your Keplr wallet installed and configured it's time to transfer some Akash $AKT to your account.
To transfer Akash $AKT to your Keplr Wallet follow these simple steps;
- Click the “K” icon or open the Extensions window and click on the “Keplr Extension“
- Your wallet window will open with the Cosmos Wallet displayed
- Click on Cosmos in the header and select Akash from the displayed list
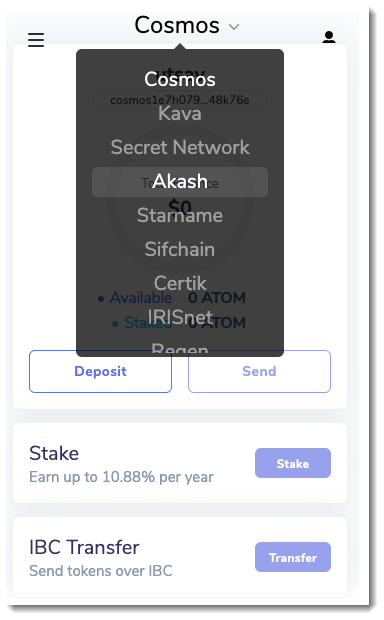
- Once you select Akash, you’ll have access to your Akash $AKT Keplr wallet (your wallet will have a zero balance initially)
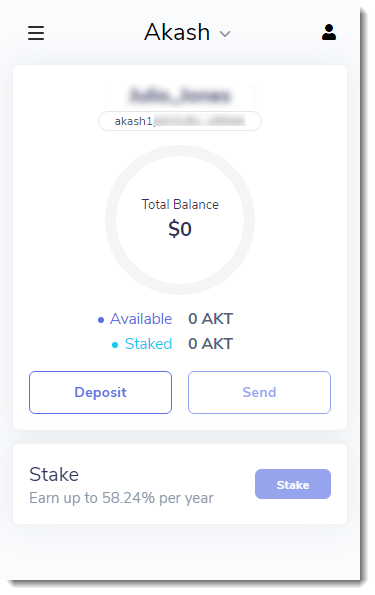
- Now we are ready to send some Akash AKT to our wallet!
- To make a deposit to your wallet, click on the “Deposit” button. You will then see the deposit address and QR code for your wallet.
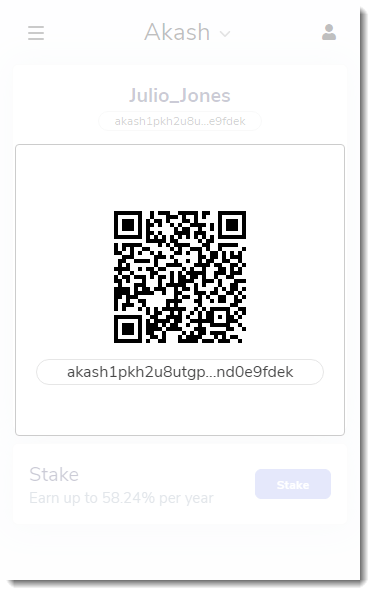
- Depending on where you are sending Akash $AKT from, you can either scan the QR code or “click” on your your Akash address with your mouse to copy it to your computer clip board.
- Make a deposit by copying your Keplr AKT wallet address and using it to transfer $AKT tokens from your exchange or other private wallet.
- After successfully depositing $AKT in your Keplr wallet you’ll be automatically directed to wallet.keplr.app to start staking.
- On the wallet page you’ll see a list of validators. Select “OurLink | ValidatorNode” to start staking with us.
Or choose any of the other Validators you wish to Stake with.
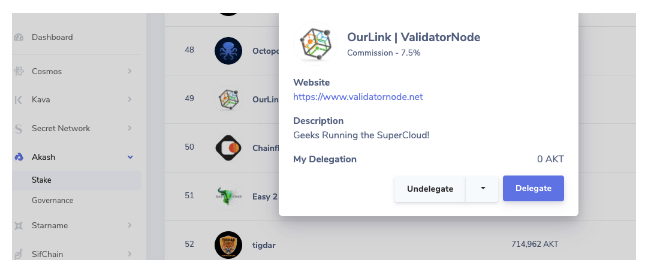
- Click the “Delegate” button. You will be prompted to put in the amount/number of tokens you would like to delegate with ValidatorNode.
Make sure you fill in the details correctly. Always recheck the amount and other details.
- Once you delegate you’ll be asked to set a fee. We recommend leaving it on “average.”
- Select submit and that’s it!
You have now created a passive income for yourself by Staking your Akash $AKT with ValidatorNode.
Summary
In this article we have provided the steps and walked thru the process of How to Stake/Delegate Akash $AKT using Keplr Browser Extension. This article is part of a series of articles that we are publishing to assist users of Akash and to raise the awareness of Akash.
The Akash Network (Akash) is a secure, transparent, and decentralized cloud computing marketplace that connects those who need computing resources (clients) with those that have computing capacity to lease (providers).
Akash acts as a “super” cloud platform (supercloud) – providing a unified layer above all providers on the marketplace so as to present clients with a single cloud platform, regardless of which particular provider they may be using. Clients use Akash because of its cost advantage, usability, and flexibility to move between cloud providers, and the performance benefits of global deployments. Providers use Akash because it allows them to earn profits from either dedicated or temporarily-unused capacity.
ValidatorNode is a fast growing network of validator services. Having successfully partnered with the promising Akash Network we now have more than $10 million dollars worth of delegated crypto assets.
Our innovative staking-as-a-service (SAAS) model allows retail investors/individuals to leverage their cryptocurrency tokens and earn profits. As a community-driven enterprise we believe in mutual growth forging meaningful partnerships.
Our “Delegator Partners” benefit from the highly secure and advanced and updated features of the ValidatorNode ecosystem. You make the maximum while we ensure seamless continuity and scalability of the validating and staking process.
Comment on Our Post